Estimate forms for contractors: build one right
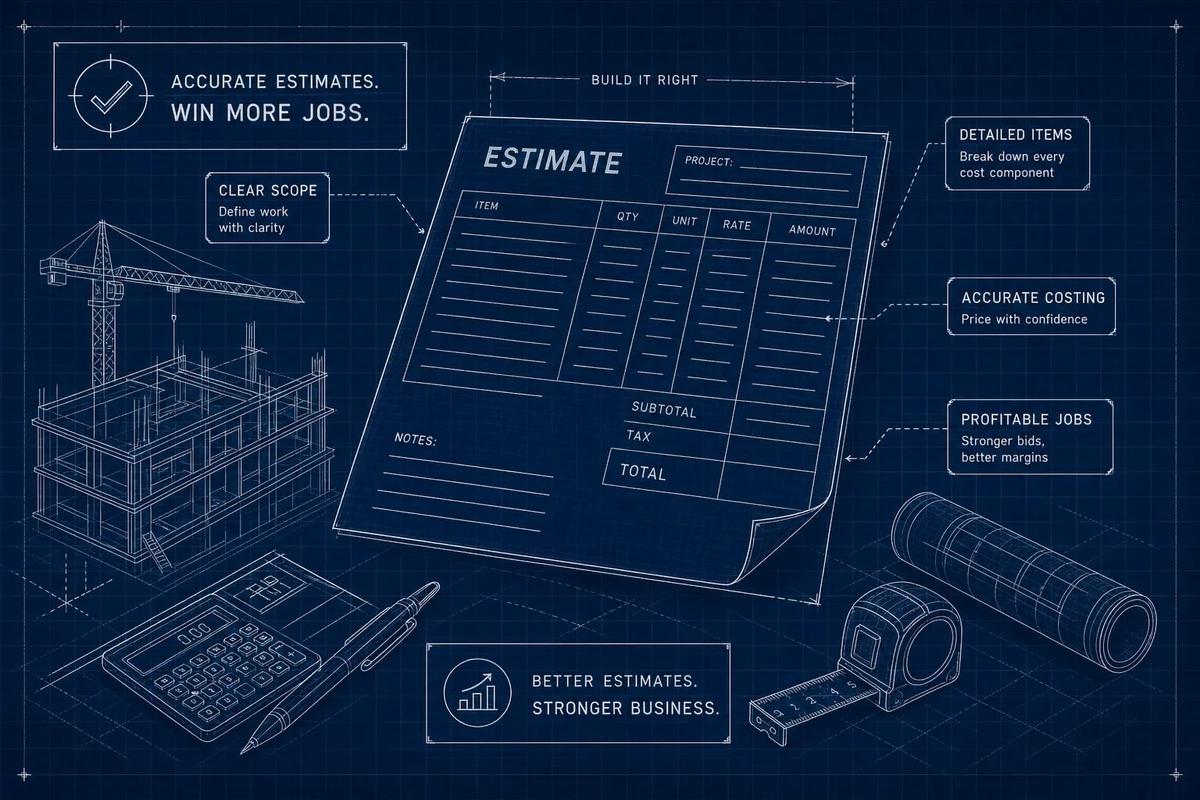
Estimate forms for contractors need six things to work: your business info, the client's project details, a full scope of work, an itemized cost schedule, a pricing summary with markup, and clear payment terms. That's the short answer. This article walks you through each one in detail, shows you realistic filled-in examples for roofing, electrical, plumbing, and general contracting, explains the markup-vs-margin math that trips up most contractors, and covers which file format fits your workflow best.
By the end, you'll know exactly how to structure, price, and deliver a professional estimate that clients can actually read and approve. And if you've been spending two to three hours building every proposal from scratch, the last section will show you a faster way.
Key takeaways
- Six required sections: Every professional contractor estimate form needs a business/project header, scope with exclusions, itemized cost schedule, pricing summary, payment terms, and signature lines.
- Burdened labor rates: Never price labor at raw wages. Add payroll taxes, workers' comp, benefits, and paid time off before multiplying by hours.
- Markup is not margin: A 20% markup on cost produces a 16.7% profit margin, not 20%. Use the correct formula: total cost divided by (1 minus target margin).
- Format matters by use case: Use an estimate template Excel file for live calculations, a PDF for client delivery, and native accounting software for seamless invoice conversion.
- Speed closes deals: According to ez-estimates.com, estimates delivered within 24 hours of a site visit are associated with close rates around 35 to 45 percent, compared to 20 to 30 percent for those sent after 48 hours or more. Treat these as directional benchmarks, since lead quality, price position, and project type all affect win rates.
- AI estimating changes the timeline: Platforms like URBLD generate structured, itemized estimates from job-site photos, cutting hours of manual form-building down to minutes.
Estimate forms for contractors: required fields
Business and project header information
Every estimate form starts with identifiers: your company name, logo, license number, insurance info, and contact details on one side; the client's name, billing address, phone, and email on the other. Add an estimate number, the date it was prepared, and an expiration date, typically 30 days. Include the job-site address separately from the billing address, because they're often different. These aren't formalities; they're the foundation that makes the document legally traceable.
Scope of work, assumptions, and exclusions
This section prevents more disputes than any other part of the construction estimate form. Write a plain-language description of the project, then break it down by phase or trade. List what's included, what you're assuming about existing conditions, what the client is responsible for, and what's explicitly excluded: hidden damage, utility upgrades, landscaping, engineering. A clear scope ensures your price isn't interpreted as a blank check for unspecified work.
Itemized cost schedule
Structure the cost table with these columns: item or phase, description, cost category (labor, material, equipment, or subcontractor), quantity, unit, unit cost, and extended price. Break line items into labor, materials, equipment, subcontractors, permits, and other direct costs. Separating them makes the estimate easier for clients to review and easier for you to job-cost afterward. That post-job comparison is what makes your next estimate sharper.
Pricing summary and payment terms
After the itemized table, present a clean summary: direct-cost subtotal, sales tax, contingency, overhead, markup or profit, and the total estimate. Below that, state the deposit amount, the progress-payment schedule, and your accepted payment methods. Many clients skim to these two sections first, so keep them uncluttered and precise. Everything else can live in the detail above.
How do you calculate labor, materials, and markup correctly?
Calculating burdened labor cost
Never use the employee's raw wage as your labor rate. Use the burdened rate: wages plus payroll taxes, workers' compensation, benefits, paid time off, and any other employment costs. Then multiply by realistic hours, including travel, setup, teardown, cleanup, and supervision, not just installation time.
Material takeoff and pricing
Perform a full takeoff: list every material, quantity, unit, and current supplier cost. Apply a waste factor where appropriate, and add delivery, freight, and minimum-order charges. Keep material cost separate from material selling price on your internal worksheet so you can compare estimated versus actual after the job. That comparison is what progressively improves your estimates over time.
How estimate forms for contractors handle markup and margin
Markup is profit as a percentage of cost. Margin is profit as a percentage of the selling price. To hit a specific profit margin, divide total cost by (1 minus the target margin). Getting this distinction right is the difference between building a business and slowly losing money on every job.
Which file format should you use for your contractor estimate template?
The right format depends on where you are in the estimate's life cycle. Some formats work best for building and calculating; others work best for presenting and delivering.
An estimate template Excel file is the strongest choice when your estimates require automatic subtotals, markup formulas, tax calculations, and profit checks. Google Sheets adds real-time collaboration: you and your project manager can work on the same estimate simultaneously, and clients can view a shared link without downloading anything. Both formats reward contractors who build a master contractor estimate template once and reuse it cleanly across jobs.
Word lets you produce a document that reads like a formal proposal, with scope narrative, exclusion clauses, warranty language, and signature lines all formatted cleanly. Convert it to an estimate form PDF before sending so the client sees exactly what you intended, with no formula cells or formatting breaks. PDF is the standard delivery format for a finalized estimate: professional, non-editable, and easy to sign.
If you work in QuickBooks, build the estimate inside QuickBooks itself. The platform treats estimates as non-posting transactions and converts accepted estimates into linked invoices without any re-entry of line items or customer details, according to QuickBooks. If you prepare estimates outside QuickBooks, a structured Excel file with one row per line item and consistent columns (customer, date, item, quantity, rate, tax code, total) is the cleanest format to import or manually migrate.
What do filled-in trade estimates actually look like?
Roofing estimate: measuring by the square
A roofing contractor estimate template breaks the job into tear-off and disposal, shingle material, underlayment, ice-and-water membrane, drip edge, ridge vent, flashing, installation labor, and dumpster costs, all priced per square (100 sq. ft.) or per linear foot where appropriate. One roofing square equals 100 square feet of roof surface, so a 2,400-square-foot roof converts to 24 base squares; a 12% waste factor brings that to roughly 27 material squares. Any assumption about decking condition belongs in a notes column or exclusion line, not buried in a lump sum. As a best practice, list the permit fee on its own line, separate from the installation total, since local requirements vary.
Electrical and plumbing estimate examples
Electrical estimates itemize by circuit, device, and fixture: service call, 20-amp circuits, GFCI receptacles, recessed lights, dimmers, smoke detectors, panel labeling, and permits. Plumbing estimates cover the diagnostic charge, equipment (water heater, shutoff valve, expansion tank), materials, installation hours, haul-away, and permit allowance. Both trades benefit from explicit exclusion lines. Electrical estimates should exclude drywall repair and service-panel replacement; plumbing estimates should exclude gas-line upgrades and concealed pipe repairs.
General contracting and concrete estimate structure
A general contracting estimate organizes work by phase: demo, framing, subcontractors, finishes, and permits, with contractor overhead and profit shown as a single line below the direct-cost subtotal. A concrete driveway estimate breaks the job into demolition, base preparation, formwork, reinforcement, concrete quantity by cubic yard, placement and finishing, and sealer. For both trade types, payment schedules (deposit plus two or three progress payments) belong directly below the total price, not in a separate attachment. Keeping them together is the difference between a document clients read and one they skim past.
What mistakes cause contractors to lose bids or leave money on the table?
Confusing markup and margin at the pricing stage
This is the most common and most expensive mistake. A contractor who needs a 30% profit margin but applies a 30% markup is actually running at 23% margin, and that gap compounds quickly across dozens of jobs per year. Build the correct formula into your estimate forms for contractors once so it calculates the right selling price automatically: total cost divided by (1 minus target margin). That's a one-time fix that pays off on every job you price from then on.
Vague scope statements that invite change-order disputes
Clients read scope sections carefully when something goes wrong. Generic phrases like "bathroom renovation" or "electrical work as needed" leave room for disagreement about what was promised. Every estimate form should identify included work, client-supplied items, allowances for unselected materials, and explicit exclusions. Writing clean exclusions prevents disputes and protects your reputation with clients who might otherwise feel misled.
Missing contingency and allocated overhead
Contingency covers reasonably foreseeable unknowns: hidden rot, delivery delays, weather, rework. Overhead covers what it costs to run your business: estimating time, vehicles, software, office staff, insurance, and marketing. Neither shows up in your material and labor costs automatically. If you don't put them on separate lines in the pricing summary, you're not charging for them, and your apparent "profit" is quietly subsidizing both. A common method for overhead is to divide annual operating costs by expected annual billable hours, producing an overhead rate per hour that you then allocate to each job.
Are manual estimate templates still the best way to build proposals?
Why spreadsheets slow you down at scale
A spreadsheet estimate works fine when you're sending a handful of proposals per month. As volume grows, the problems multiply: version control across multiple estimators, inconsistent formatting, formula errors, and manually re-entering customer and job data from your CRM. Building a typical residential trade estimate by hand takes about one to three hours of focused work after a site visit, and broader estimates put that range at two to five hours when measurements, supplier pricing, labor calculations, and proposal formatting are all involved. That's time spent formatting, not selling.
What modern field service platforms handle differently
Dedicated field service management platforms connect estimating to the rest of the job cycle. Customer data flows in from the CRM, so there's no re-entry. Accepted estimates convert to jobs and trigger scheduling without a separate step. Invoices generate on job completion rather than waiting for someone to open a spreadsheet. The estimate stops being a standalone document and becomes the first step in an automated workflow, where every downstream action is already set up and waiting.
How URBLD's AI estimating cuts the site-visit-to-proposal gap dramatically
URBLD takes this further with photo-based AI estimating. After a site visit, you upload photos of the job, and URBLD's AI generates a structured, itemized, ready-to-send estimate from that visual input, no blank contractor quote template to fill in, no manual line-item entry for dimensions you've already seen and photographed. The time from site visit to client-ready proposal drops from hours to minutes. Because URBLD is a full business operating system, that estimate connects directly to your CRM contact, your scheduling calendar, your contract workflow, and eventually your invoice, all in one platform with no data re-entry between steps. For high-volume field service businesses that have outgrown patchwork software stacks, that's not a convenience feature; it's a structural advantage.
How do you deliver an estimate that gets accepted?
Timing is a competitive advantage
Contractors who send estimates within 24 hours of a site visit close at significantly higher rates than those who take 48 hours or more. According to ez-estimates.com, 24-hour proposals are associated with close rates around 35 to 45 percent, while estimates delivered after 48 to 72 hours fall into the 20 to 30 percent range. Those figures should be treated as directional benchmarks rather than precise industry statistics, because factors like lead quality, price position, and project type all affect win rates. What they clearly suggest is that clients interpret speed as professionalism, and slow estimates give competing bids time to arrive first.
What clients actually read on your estimate form
Most clients go straight to three things: the total price, the payment schedule, and the scope of work. They want to know what they're getting, what they're not getting, and when they owe money. A clean estimate form puts all three in obvious places, not buried in paragraphs or hidden on page three. Write the scope in plain language rather than trade jargon, and your estimate reads like a clear agreement rather than a confusing technical document that requires a contractor to interpret.
Build estimate forms for contractors that work as hard as you do
A well-built contractor estimate form is structured, accurate, and fast to produce. Get the right sections in the right order, header, scope, itemized costs, pricing summary, and terms, use burdened labor rates and full material takeoffs, and apply the correct markup-to-margin formula. Build reusable templates or use tools that eliminate the template problem altogether, and you'll spend less time formatting and more time closing jobs.
URBLD's photo-based AI estimating is built specifically for field service businesses that have outgrown manual form-building and need a faster path from site visit to signed proposal. Upload job-site photos, get a structured itemized estimate, and move straight into scheduling, contracts, and invoicing, all without re-entering data between steps.
Whether you're refining your construction estimate form today or ready to move to an AI-powered workflow, the goal is the same: a professional estimate that reaches the client fast, communicates value clearly, and converts to a job without friction. Book a demo with our team to see how it works in practice.
Frequently Asked Questions
How should we list client-supplied items on an estimate form?
List client-supplied items explicitly in the scope of work so the client knows what they're responsible for and what you will provide. State them as included or excluded lines and, where appropriate, add allowances for unselected materials so pricing and responsibility are clear.
Can we import an Excel estimate into QuickBooks or otherwise avoid re-entering line items?
Yes, a structured Excel file with one row per line item and consistent columns is the cleanest format to import or manually migrate into QuickBooks. If you build the estimate inside QuickBooks directly, the platform converts accepted estimates into linked invoices without any re-entry of line items or customer details.
Where should the payment schedule appear on the estimate form?
Place the deposit amount and any progress-payment schedule directly below the total price on the estimate form. Keeping the payment schedule immediately below the total, rather than in a separate attachment, makes the document easier for clients to read and increases the chance they'll approve it.
How should we show contingency and overhead so we don't undercharge?
Show contingency and allocated overhead as separate line items in the pricing summary rather than burying them in rates or assumptions. Use a method like dividing annual operating costs by expected annual billable hours to produce an overhead rate per hour, then allocate that to each job so overhead and contingency are charged transparently.
Found this useful? Share it with another contractor or service business owner.